
Hey developers, ever feel like opening a web browser and firing up an AI chatbot is a tedious interruption to your workflow? That fleeting moment when your coding flow is broken! Well, now you can summon Google's powerful AI, Gemini, directly from the black screen, our eternal friend: the 'terminal'. It's all thanks to the 'Gemini CLI'. This single guide will boost your development productivity by 200%, covering everything from installation to practical application and even browser automation! 🚀
What Exactly is Gemini CLI? 🤔
Gemini CLI (Command Line Interface), as the name suggests, is a tool that lets you communicate directly with the Gemini AI model from your terminal or command-line environment. Without complex API integrations or separate programs, you can leverage almost all of Gemini's features—like code generation, debugging, document summarization, and brainstorming—with simple commands. It's like having your own personal AI assistant embedded in your terminal.
The biggest advantage is that by integrating AI into the terminal environment where developers spend most of their time, you can maximize productivity without breaking your workflow. Automating simple repetitive tasks by linking it with shell scripts becomes a piece of cake!
"Gemini CLI is not just another chatbot. It’s a full-fledged AI agent that lives in your terminal, understands your codebase, and accelerates your workflows." – Google Gemini Team
Prerequisites: Just Grab These Two Things!
No need for a grand setup. If you have the following two items, you're already set to use Gemini CLI. 😉
- Node.js (version 18 or higher): Gemini CLI runs in a Node.js environment. If you don't have it installed or have an older version, please install the LTS version from the official Node.js website. You can check your version by typing
node -vin your terminal. - Google Account: This is the basic authentication method for using the Gemini service. With just a Google account, you can make up to 60 requests per minute and 1,000 requests per day for free. That's more than enough for personal use!
Installation: Done in 5 Minutes! OS-Specific Guide
This is the most crucial step, but don't worry. A single command line is all it takes, regardless of your operating system. Open your terminal and enter the command below.
Installation, Done! (Recommended)
This is the simplest and most recommended method. It runs the latest version whenever you need it without a separate installation process.
npx https://github.com/google-gemini/gemini-cli
# Create a file named run_gemini.bat and add the following content
@echo off
echo Launching Gemini CLI...
npx https://github.com/google-gemini/gemini-cli
echo Gemini CLI execution completed.
pause
Alternatively, if you want to install it globally on your computer and use the short command gemini, use the following command.
npm install -g @google/gemini-cliAfter running the command, the installation will proceed, and a few setup steps will appear on the first run.
- Choose a Theme: Pick your favorite terminal theme. Use the arrow keys to navigate and press Enter to select.
- Select Authentication Method: Choose 'Login with Google' and press Enter.
- Browser Authentication: A web browser will open shortly. Log in with your prepared Google account and grant the necessary permissions.
Once you see the success message in your browser window, you're all set. Gemini will be waiting to greet you back in the terminal! 👋
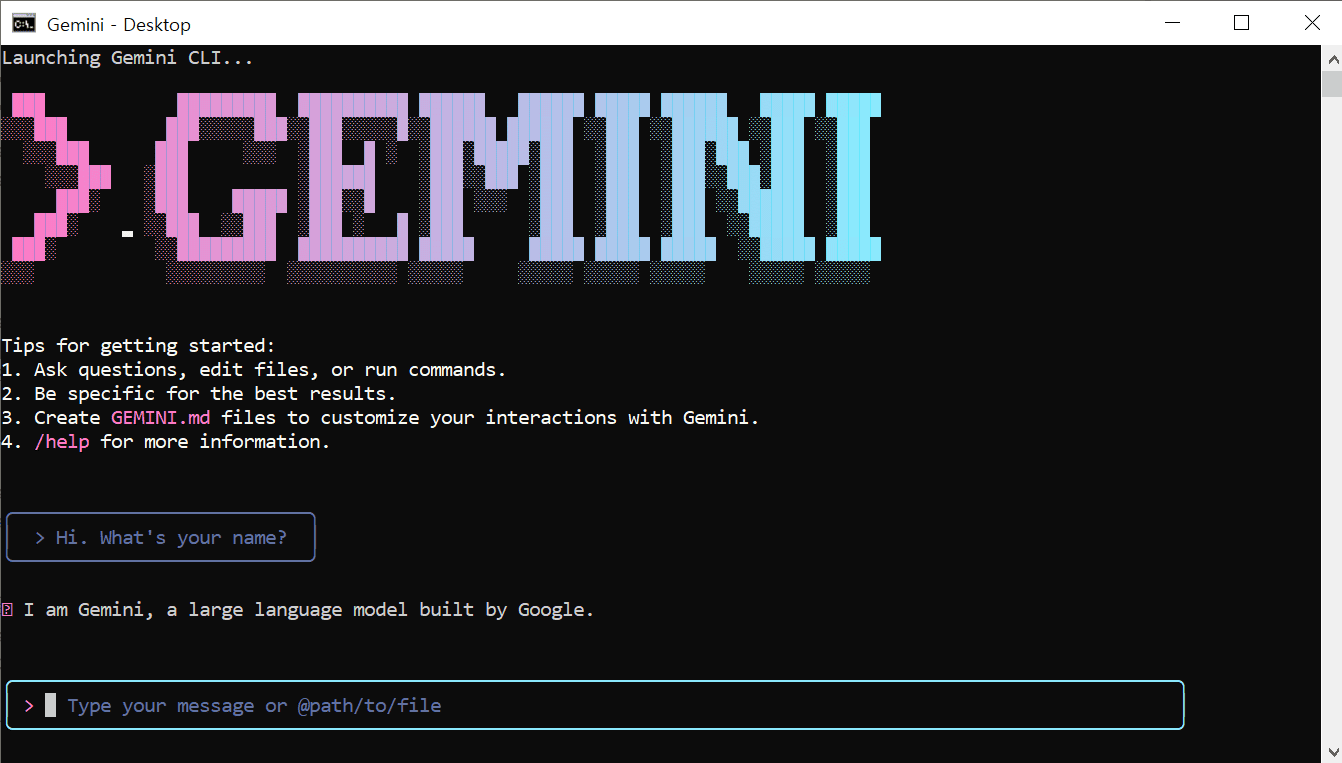
Basic Usage: Your First Chat with Gemini
Now it's time to actually use Gemini. The interactive mode starts either from the prompt that appears after installation or by opening a new terminal and typing gemini (for global installation) or npx https://github.com/google-gemini/gemini-cli. It's that simple, right?
Ask anything you're curious about. For example...
# Request a simple Python code
> "create a python function that calculates the fibonacci sequence"

# Ask about a file in the current directory (useful in terminals like VSCode's)
> "@index.js explain the functionality of this javascript code"

# Ask for a git command
> "tell me how to undo the last commit in git"
Use Shift + Enter for a new line and Enter to send the message. Type /help to see all available commands—be sure to try it out.
Pro Tips: Level Up Your Practical Skills!
Basic conversation is great, but the true power of Gemini CLI shines with API key integration and advanced features. Here are some tips to take your productivity to the next level.
1. Break the Limits with an API Key
While basic Google account authentication is sufficient, using an API key is recommended if you need more requests or want to connect to a specific project.
- Go to the Google AI Studio and create a new API key.
- Register the obtained key as an environment variable in your terminal. Use the command appropriate for your operating system.
macOS / Linux (.bashrc, .zshrc, etc.)
export GEMINI_API_KEY="paste_your_api_key_here"Windows (Command Prompt)
set GEMINI_API_KEY="paste_your_api_key_here"Windows (PowerShell)
$env:GEMINI_API_KEY = "paste_your_api_key_here"After setting this up and restarting your terminal, Gemini CLI will use this API key for authentication.
2. Project-Specific AI with GEMINI.md
If you create a GEMINI.md file in your project's root directory, Gemini CLI will read this file first to understand the context when run from that directory. For example, if you write rules like, "This project uses React and TypeScript, and the coding style follows Prettier rules," it will generate much more suitable answers for your project. Smart, isn't it?
3. Playwright Integration: Browser Automation from Your CLI! (Using MCP)
One of Gemini CLI's most powerful features is integrating with external tools like Playwright via the MCP (Multi-modal Command Palette). This lets you experience the magic of controlling a web browser with natural language commands right from your terminal. Use it to draft E2E test scripts or automate web scraping tasks.
Step 1: Install the Playwright MCP Server
First, you need to globally install the server that will bridge Gemini CLI and Playwright.
npm install -g @executeautomation/playwright-mcp-serverStep 2: Register the Server in Your Gemini CLI Settings
Next, you need to tell Gemini CLI where to find the Playwright server. Open the setting.json file at the following path and add the configuration. If the file or directory doesn't exist, create it.
- Windows:
C:\Users\{YourUsername}\.gemini\setting.json - macOS / Linux:
~/.gemini/setting.json
{
  "mcpServers": {
    "playwright": {
      "command": "npx",
      "args": ["-y", "@executeautomation/playwright-mcp-server"]
    }
  }
}
If your `setting.json` file already contains other settings, simply add the `playwright` configuration inside the `mcpServers` object.
Step 3: Run and See an Example
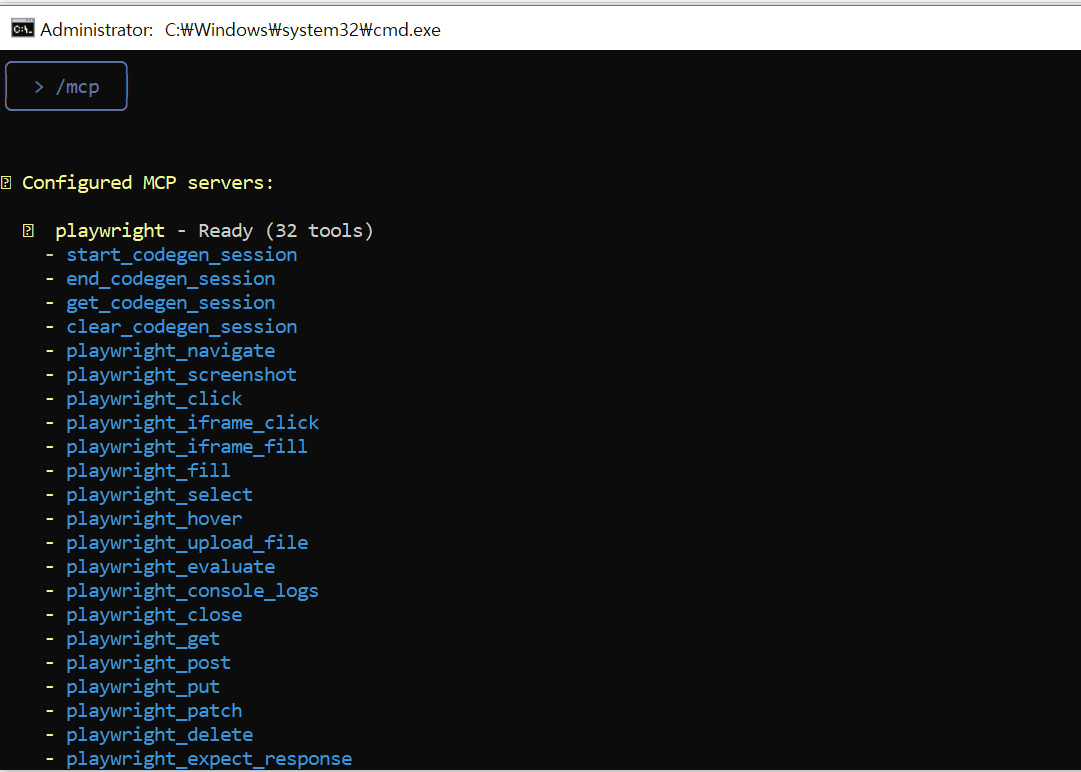
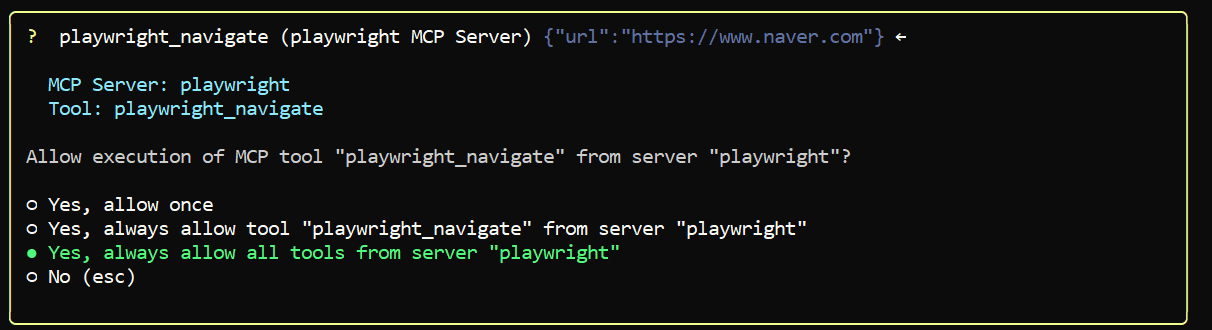
That's it! Now, run Gemini CLI from your terminal and try the @playwright command.
# Go to google.com, search for Gemini CLI, and take a screenshot
> @playwright "go to https://google.com, search for Gemini CLI, and take a screenshot"
When you run this, Gemini CLI will control Playwright to actually open a browser, perform the instructed tasks, and report the results. Truly amazing, isn't it?
Conclusion: You're Now an AI Wizard on the Terminal
We've taken a whirlwind tour from installing Gemini CLI to exploring its advanced features. You no longer need to wander off to a browser while coding. You are now fully equipped to become an 'AI Wizard' who handles code reviews, refactoring, error analysis, and even browser automation with just a few commands within the dark terminal screen.
Open your terminal right now and type npx https://github.com/google-gemini/gemini-cli. A whole new world awaits you! 😉