"Huh? But it worked on my machine..." Every developer has likely said or heard this famous last line. 😭 We've all had headaches dealing with different Node.js version requirements for each project. Today, let's dive deep into the latest installation and usage guide for a magical tool that will free us from the pain of version conflicts: NVM (Node Version Manager)!
Why Exactly Do We Need NVM? 🤔
Imagine Project A requires a stable Node.js version 18, while Project B needs the latest features from version 22. Without NVM, we'd have to go through the tedious process of uninstalling and reinstalling Node.js every time. It's like emptying your entire kitchen toolbox and buying new tools for every single recipe.
NVM solves this very problem. It acts as a smart manager, creating multiple "Node.js drawers" on our computer and letting us open the drawer for the version we need, whenever we need it. This allows us to build isolated development environments for each project and enjoy a peaceful development life free from version conflicts. 🕊️
"For a Node.js developer, NVM isn't an option; it's a necessity. It's the best shield against wasting time on unexpected version issues, allowing you to adapt flexibly to various project requirements." – An experienced developer
Installing NVM on macOS & Linux (The Most Common Method)
If you're using a macOS or Linux-based operating system, you can start the installation by simply entering a single command line in your terminal. The most widely used method is to run the installation script using `curl` or `wget`.

Copy and paste one of the following commands into your terminal.
# Using curl
curl -o- https://raw.githubusercontent.com/nvm-sh/nvm/v0.39.7/install.sh | bash

# Using wget
wget -qO- https://raw.githubusercontent.com/nvm-sh/nvm/v0.39.7/install.sh | bash
This script creates the `~/.nvm` directory and adds code to your shell configuration file (like `.zshrc`, `.bash_profile`, etc.) to load NVM. Once the installation is complete, you must either close and reopen your terminal completely or run the command below to apply the settings.
# If you use zsh
source ~/.zshrc

# If you use bash
source ~/.bash_profile
Finally, if you type `command -v nvm` and see 'nvm' as the output, it means the installation was successful!
NVM Installation for Windows Users (nvm-windows)
Windows users, don't despair! While not official NVM, there's an excellent alternative, nvm-windows, which provides the same functionality. The installation is even simpler, using a GUI installer.
- First, go to the nvm-windows releases page and download the latest `nvm-setup.exe` or `nvm-setup.zip` file. (https://github.com/coreybutler/nvm-windows/releases)
- Run the downloaded installer, accept the license agreement, and click 'Next' to proceed. The default settings should be fine for most users.
- Important: If you have a pre-existing Node.js installation, a prompt will ask if you want nvm-windows to control it. It's recommended to click [Yes].
- Once the installation is complete, open a new terminal (CMD or PowerShell) with administrator privileges and verify the installation with the `nvm version` command.

Key Takeaway: Restart Your Terminal After Install!
Regardless of your operating system, you must restart your terminal or reload your shell config file (`source`) after installing NVM for it to recognize the commands. If you see a "command not found" error, this is the cause 99% of the time!
Mastering NVM Core Commands: All You Need to Know ✅
Now that the installation is done, it's time to handle NVM like a pro. In reality, you only need to know a few core commands.
- List available versions:
nvm ls-remote
Shows a long list of all Node.js versions available for installation. - Install a specific version:
nvm install 18.17.1
Installs the exact version number you specify. - Install the latest LTS version:
nvm install --lts
A very useful command to install the latest stable Long Term Support version. - List installed versions:
nvm ls
Shows the Node.js versions installed on your computer. The currently active version is marked with an arrow (->). - Switch to a different version:
nvm use 18.17.1
Changes the Node.js version for the current terminal session. - Set a default version:
nvm alias default 22.2.0
Specifies the version to be used by default every time you open a new terminal. This saves you from the hassle of typing the `use` command every time.(Supported only on Mac)
# Example: Installing the LTS version and setting it as default
nvm install lts
nvm use --version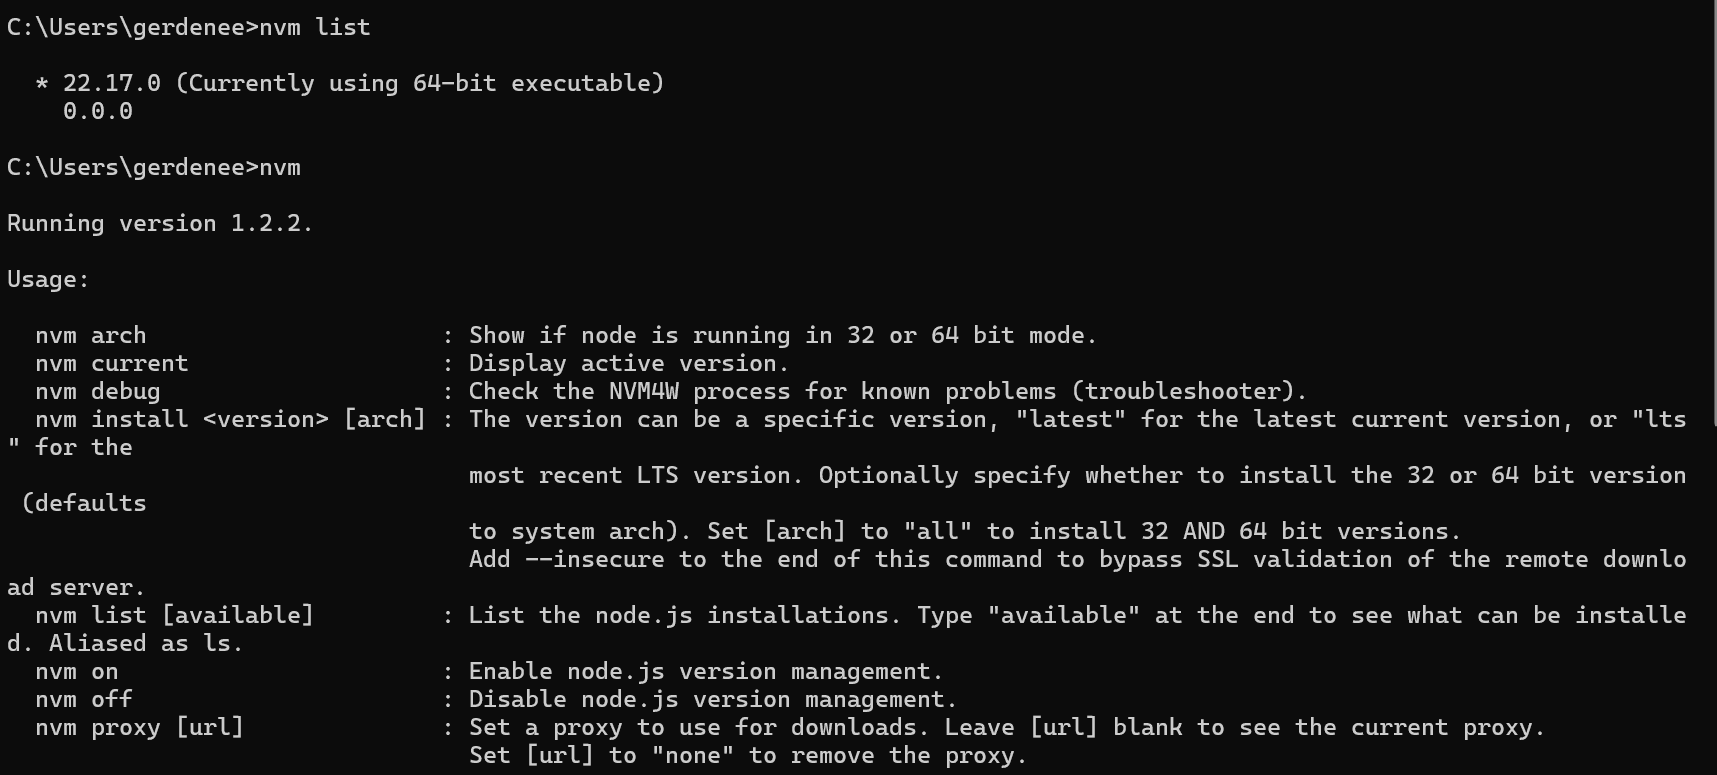
Conclusion: The First Step Towards a Smarter Dev Environment
You now have a powerful weapon in your arsenal: NVM! Instead of making excuses like "it worked on my machine," you now have a flexible development environment ready to tackle any project with confidence. We hope you enjoy a stress-free coding life by easily managing Node.js versions with NVM. Happy Coding! 💻