"I'm in the middle of developing a complex feature, and suddenly I get a request for a hotfix because of a critical bug on production." Every developer has faced this sweating moment at least once. Crumpling your work into git stash, switching branches, reinstalling twisted dependencies... It's time to stop. Today, we'll learn how to escape this hell using Git Worktree. 🚀
1. What is Git Worktree?
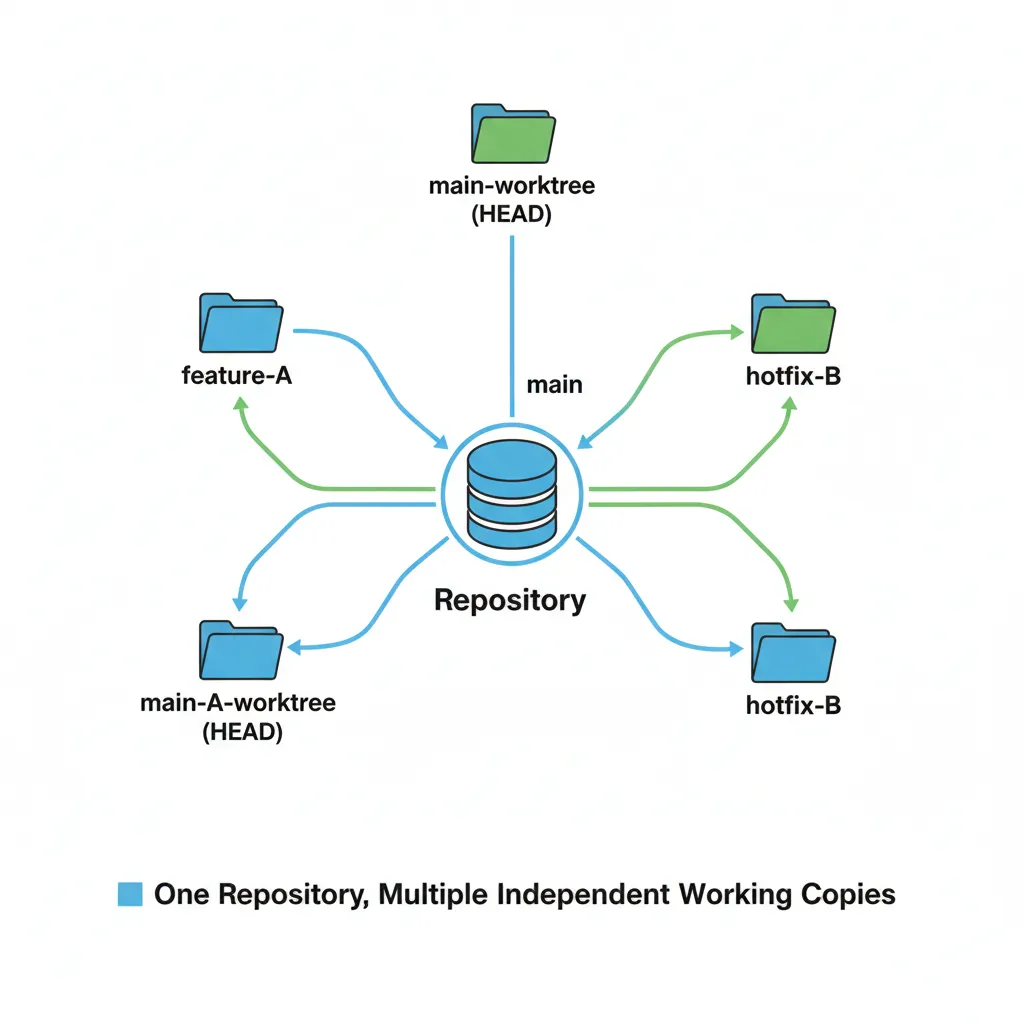
A standard Git repository follows the formula: One Repository = One Working Directory. However, Git Worktree allows you to create multiple Working Directories simultaneously while sharing a single local repository (.git database).
Git Clone vs. Git Worktree
| Feature | Git Clone (Multiple) | Git Worktree |
|---|---|---|
| Disk Usage | Duplicated (Heavy) | Shared Database (Light) |
| Syncing | Needs 'pull' for each | Single 'fetch' updates all |
| Creation Speed | Slow (Depends on Network) | Instant (Local Operation) |
| Context Switching | Requires 'git stash' | Just move to another folder |
Directory Structure Example
[Standard Clone]
my-project/ (Root Folder)
├── .git/ (Full History)
├── src/
├── package.json
└── ...
(Only one branch visible)
[Git Worktree]
my-project/ (develop branch)
├── .git/
└── ...

../hotfix-area/ (hotfix branch)
├── .git (link to main database)
├── src/
└── ...
(Multiple branches active)
The core concept is "One Brain (.git), Multiple Bodies (Working Directories)." It's much more efficient than running clone multiple times.
"Using Worktree reduces context switching costs to near zero. Different branches are physically spread out in different folders." – Senior DevOps Engineer
2. Basic Usage & Scenario
Let's solve the common "Emergency Hotfix" situation using Worktree.
# 1. Keep your current work folder (my-project) as is.
# 2. Create a new worktree for the hotfix in the parent directory.
$ git worktree add ../emergency-fix main

# 3. Move to the newly created folder.
$ cd ../emergency-fix

# 4. A clean environment based on 'main' is ready.
# Create a branch and fix the bug.
$ git checkout -b fix/urgent-bug
# ... fix bug, then commit & push ...

# 5. When finished, return to your original work folder.
$ cd ../my-project

# 6. Remove the used worktree.
$ git worktree remove ../emergency-fix
During this whole process, the files in your original my-project folder remained untouched, and no stash was required.
3. Advanced Strategy: Bare Repository
The cleanest way to use Git Worktree is by utilizing a Bare Repository. This method turns the project's root folder into a "management-only folder," and all actual work is performed in sub-worktree folders.

# 1. Create top-level folder
$ mkdir clean-architecture-repo && cd clean-architecture-repo

# 2. Bare Clone (Get only git data in .bare folder)
$ git clone --bare https://github.com/your/repo.git .bare

# 3. Create .git file (The Link)
$ echo "gitdir: ./.bare" > .git

# 4. Create actual worktree
$ git worktree add main main
Why Bare Repository?
It perfectly separates the .git folder (brain) from the actual code (body), reducing the risk of accidentally deleting or corrupting the main repository.
4. Pro Tips & Caveats
- Dependency Management & pnpm: Using
pnpmshares a global store, drastically saving disk space even with multiplenode_modules. - VS Code Workspace: Use the
File > Add Folder to Workspace...feature to manage multiple worktree folders in a single window. - Config Sharing: All worktrees share
.bare/config. However, files like.envare managed separately per folder.
Conclusion
Git Worktree is a powerful tool that significantly boosts productivity, especially when juggling multiple versions or conducting frequent code reviews. Try applying the Bare Repository strategy to your project this weekend! 🛠️